How to Clean Cedar Shake Siding Without Damage
Gentle, low-pressure cleaning and cedar-safe products preserve cedar shake siding and prevent costly rot.
Cleaning cedar shake siding requires care and proper techniques to avoid damage. Cedar is a soft, porous wood that can be harmed by high-pressure washing or harsh chemicals like chlorine bleach. Follow these steps to clean your siding safely:
- Inspect First: Check for cracks, warping, moss, or missing shakes. Repair any damage before cleaning to prevent further issues.
- Use the Right Tools: A garden hose, soft-bristle brush, and sprayer with a soft tip are ideal. Avoid high-pressure washers unless the pressure is reduced to under 500 PSI.
- Choose Cedar-Safe Cleaners: Use oxygen bleach for mold or mildew and wood brighteners for tannin stains. Avoid chlorine bleach, as it strips natural oils and weakens the wood.
- Pre-Wet the Siding: Saturate the wood with water to prevent over-absorption of cleaning solutions.
- Apply Cleaner Safely: Work bottom-up to avoid streaking. Let the solution sit for 5–20 minutes, depending on the buildup.
- Scrub Gently: Use a soft-bristle brush and scrub along the wood grain to avoid scratches.
- Rinse and Dry: Rinse from top-down using low pressure, then let the siding dry for 48–72 hours. Use a moisture meter to ensure moisture content is below 15% before sealing.
Post-Cleaning Tips:
- Inspect for any remaining damage or stains.
- Apply a protective treatment like a water-based stain or clear sealer to extend the lifespan of the siding.
- Reapply treatments every 2–5 years based on your climate.
Following these steps ensures your cedar siding stays in great condition for decades.
How To Clean Cedar Shingles Without Wrecking Them
sbb-itb-634c8b2
Inspecting Cedar Shake Siding Before You Clean
Regular inspections of your cedar siding - ideally in spring and fall - are essential to catch small issues before they turn into expensive repairs. Cleaning damaged shakes without addressing the underlying problems can worsen the situation by forcing moisture into the wall cavity, loosening pieces, or exposing the underlayment to further harm. Below, we’ll explain what to look for during your inspection to ensure your siding is ready for cleaning.
Spotting Problem Areas
One of the most common issues with cedar siding is organic growth. Moss, mildew, algae, and lichen can trap moisture against the wood, speeding up the rotting process. Pay close attention to the keyways between shakes, as debris often collects there, creating a perfect environment for moisture retention. While moss or lichen typically appears after years of neglect, damage can begin much sooner if left unchecked.
Physical damage is another red flag. Look for cracked or split shakes, missing pieces, or nails that have popped out. Missing shakes are especially concerning because they leave the underlayment exposed.
"UV light can damage the roof's underlining if the shingle is not there to protect it." - Jay Racenstein
Additionally, check for cupping or warping, where shakes curl away from the wall due to prolonged moisture exposure. Warped boards often need replacing rather than cleaning. If your siding is painted or stained, inspect for peeling, bubbling, or flaking finishes. These areas will require sealing before any cleaning solutions are applied.
Why Inspection Before Cleaning Matters
Even a gentle cleaning can make existing issues worse if they’re not addressed first.
"Strong jets of water could knock individual boards loose or could force water behind the boards, though, leading to rot." - Rachel Hoffman, Contributing Writer, Angi
To prevent this, secure any loose shakes, fill cracks with wood putty or clear silicone caulk, and replace rotted or missing shakes before starting the cleaning process. As Buffalo Lumber advises:
"A little 2-hour labor now will save you time. Waiting for another year might worsen the problem and you will be spending more time and money in the process."
Don’t forget to inspect your gutters. Clogged gutters can cause water to back up and pool against the lowest rows of siding, increasing the risk of rot. Clearing them out beforehand ensures water drains properly. A thorough inspection not only protects your siding during cleaning but also lays the groundwork for a safe and effective process, as outlined in the next steps.
Tools and Cleaners Safe for Cedar Siding
Once you've inspected your cedar siding and addressed any damaged shakes, it's time to gather the right tools for cleaning. Using improper equipment can harm the wood or push water behind the shakes, so it's essential to choose tools that apply minimal pressure and treat cedar's surface gently.
Cleaning Tools to Use
When it comes to cleaning cedar siding, gentle pressure and careful handling are key. A 4-gallon backpack sprayer, such as the D.B. Smith Field King, works perfectly for evenly applying cleaning solutions across large areas without over-saturating the wood. A garden hose is another great option, as it delivers a controlled water flow that preps and rinses the siding without causing damage.
If you're considering a pressure washer, it can be safe - if used correctly. Attach a Soft Tip nozzle to reduce the pressure by about 75%, lowering a 2,000 PSI stream to a safer 500 PSI. For scrubbing, a long-handled soft-bristle brush is ideal for loosening dirt and grime without scratching the wood.
Another helpful tool is a moisture meter. After cleaning, this device ensures the wood's moisture level is below 15%, which is crucial before applying any sealant or stain.
Here’s a quick rundown of tools that are safe for cedar:
| Tool | Purpose | Why It Protects Cedar |
|---|---|---|
| Backpack/Pump Sprayer | Applying cleaning solutions | Distributes solutions evenly and gently, avoiding water infiltration |
| Soft-Bristle Brush | Scrubbing dirt and growth | Cleans without scratching or gouging the wood |
| Garden Hose | Pre-wetting and rinsing | Provides a gentle rinse that won’t damage the surface |
| Soft Tip Nozzle | Pressure washer attachment | Lowers PSI significantly, making pressure washing safer |
| Moisture Meter | Checking dryness | Ensures wood is ready for sealant by confirming moisture levels below 15% |
Once you’ve got the right tools, the next step is selecting a cleaner suited to your cedar siding's needs.
How to Pick the Right Cedar-Safe Cleaner
After assembling your tools, it’s time to choose a cleaner that matches the type of stain or buildup on your cedar. If you notice dark, fuzzy patches, you’re likely dealing with mold or mildew. In this case, oxygen bleach (sodium percarbonate) is your best bet. It’s biodegradable, safe for plants, and effectively removes organic stains without stripping the natural oils that protect cedar.
For dull, brownish discoloration - caused by tannin stains from the wood’s natural chemicals - a wood brightener with oxalic acid is the way to go. This type of cleaner restores the cedar's original color without upsetting its pH balance.
One product to avoid entirely is chlorine bleach. It may seem effective, but it’s highly damaging to cedar:
"Bleach is highly damaging due to its harsh chemical composition, which can strip away the natural oils that protect and preserve the wood." - Wash Safe
For general cleaning, a mild wood wash concentrate like Wash Safe Cedar Wash is a solid option. It removes light grime without harsh chemicals.
Here’s a comparison of cleaners to help you decide:
| Cleaner Type | Effectiveness | Safety Level | Best for |
|---|---|---|---|
| Oxygen Bleach-Based | High | Very Safe | Removing mold and mildew |
| Mild Wood Wash | Moderate | Safe | Routine cleaning |
| Brightener (Oxalic Acid) | High | Safe (if cedar-safe) | Fixing tannin stains or restoring faded wood |
With the right tools and cleaners ready, you’re all set to move on to the step-by-step cleaning process.
How to Clean Cedar Shake Siding Step by Step

How to Clean Cedar Shake Siding: Step-by-Step Guide
With your tools ready and cleaner prepared, it’s time to get started. Following the right sequence is key - rushing or skipping steps can cause damage to the siding.
Pre-Wetting the Siding
Start by saturating the cedar siding with clean water using a garden hose. Cedar is a porous softwood that absorbs liquids quickly, so pre-wetting ensures the cleaner stays on the surface, targeting grime and mold instead of soaking deep into the wood fibers.
"Saturate the cedar siding with clean water before applying any cleaning solution. This prevents the dry wood from absorbing solution too aggressively and concentrating chemicals in one spot." - Devon Moore, Operations Lead, D&D Home Services
Don’t forget to rinse nearby windows with clean water as well. This simple step protects the glass from any chemical runoff that could potentially etch or damage the surface.
How to Apply Cleaner Safely
Timing is everything when applying cleaner. Avoid working in direct midday sun or during high heat, as this can cause the solution to dry too quickly, leaving streaks or even damaging the surface. A cloudy morning or a mild afternoon works best.
Apply the cleaner starting from the bottom of the wall and working upward. This method prevents streaking by stopping the solution from running down over dry areas. Use even, low-pressure coverage to ensure the cleaner is applied consistently.
Let the cleaner sit for 5 to 20 minutes, depending on the product and how much buildup you’re dealing with. After this dwell time, you’ll be ready to scrub away any stubborn dirt.
Safe Scrubbing Methods
If there’s still mildew or dirt clinging to the siding, it’s time to scrub. Use a soft-bristled brush and gently scrub along the wood grain. Scrubbing against the grain can leave scratches that are difficult to remove.
Work from the top of the wall downward. This approach pushes debris away from already-cleaned areas and helps avoid streaking. Apply steady, light pressure - cedar is soft, and excessive force can cause damage.
"While the solution is wet, using a soft-bristled brush, scrub the cedar siding from the top moving downward to prevent streaking." - Buffalo Lumber
Rinsing and Drying the Siding
Rinse the siding from the top down using a garden hose or a pressure washer with a soft tip nozzle. This method ensures all loosened grime and cleaning residue is washed away while preventing water from being forced upward under the shakes. Keep the pressure under 500 PSI to avoid scarring the wood.
Once you’ve rinsed, allow the siding to dry completely - this usually takes 48 to 72 hours in warm weather. Before applying any protective treatments, use a moisture meter to confirm the wood’s moisture content is below 15%. Applying a finish too soon can trap moisture, leading to peeling or rot. After the siding is fully dry, inspect for any needed repairs and consider adding a protective treatment.
| Cleaning Step | Action | Key Detail |
|---|---|---|
| Pre-Wet | Saturate with garden hose | Prevents aggressive chemical absorption |
| Apply Cleaner | Bottom-up with low-pressure sprayer | Helps avoid permanent streak marks |
| Dwell | Wait 5–20 minutes | Allows the solution to break down organic growth |
| Scrub | Top-down, with the grain | Removes debris without scarring |
| Rinse | Top-down, under 500 PSI | Clears residue safely |
| Dry | Wait 48–72 hours | Prepares wood for staining or sealing |
Post-Cleaning Checks and Optional Treatments
After cleaning and allowing the siding to dry thoroughly, take the time to inspect it carefully before moving on to any protective treatments.
Checking for Repairs After Cleaning
Look for cracked, split, or missing shakes, as well as any soft spots that might indicate rot. It's also essential to clear debris from the keyways to avoid moisture buildup.
If you notice fuzziness or dark spots after rinsing, test a small area with diluted bleach. If the spot lightens, it's likely mildew; if it stays dark, you're dealing with tannin staining, which can be treated with a wood brightener like oxalic acid.
"Repairs are often a service that is offered when restoring cedar shakes. There will be some that are missing, some cracked and split, some rotted, and all need to be replaced." - Jay Racenstein
Make sure all repairs are completed using a battery-operated nail gun and fresh cedar shakes. Gaps left unrepaired can expose the wall felt underneath, leading to UV damage and moisture issues.
Once repairs are completed, you can move on to applying a protective treatment to safeguard your siding.
Applying Protective Treatments
Before applying any treatment, confirm that all repairs are done and the wood's moisture content is at or below 15%. A moisture meter can help you check this, as mentioned in the drying step. Skipping this step can drastically reduce the lifespan of your siding. Properly maintained cedar siding can last 40 to 60 years, while neglected siding may only last around 20 years.
If you used an alkaline cleaner, start with a wood brightener. This step neutralizes the wood's pH, removes tannin or iron stains, and helps the finish adhere better. Afterward, choose a sealer or stain that suits your desired look and maintenance needs.
Avoid oil-based products on cedar shakes, as they encourage mold and mildew growth due to the oils in their formulas.
"Avoid oil-based sealers, paints, or stains on cedar shingles if you want to avoid mildew and mold growth. Mildew and mold grow more rapidly on oil-based sealers because they feed on the ingredients in the oils." - Laurie Brenner
For best results, apply treatments on a cloudy or mild day. Direct sunlight can cause the product to dry too quickly, preventing it from penetrating the wood properly.
Protective Treatment Comparison Table
| Treatment Type | Purpose | Longevity | Best For |
|---|---|---|---|
| Clear Sealer / Water-Resistant Clearcoat | Protects against moisture while allowing natural graying | 2–3 years (humid); 3–5 years (dry) | Homeowners who prefer the weathered look |
| Pigmented Sealer | Provides UV protection, slows graying, and resists moisture | 2–5 years | Maintaining a "new wood" appearance |
| Water-Based Stain | Adds color and offers surface protection | Varies by climate | Enhancing color without the risks of oil-based products |
| Wood Brightener (Oxalic Acid) | Restores pH and removes tannin and rust stains | N/A (pre-treatment step) | Reviving faded or stained wood before sealing |
| Oil-Based Products | Traditional wood protection | Short (due to mold regrowth) | Not recommended for cedar shakes |
If you live in humid or coastal areas, plan to reapply protective treatments every 2 to 3 years. For drier inland climates, reapply every 3 to 5 years. Staying on top of this schedule is critical to keeping your cedar siding both attractive and durable for years to come.
Conclusion: Keeping Cedar Shake Siding in Good Shape
With proper care, cedar siding can last anywhere from 20 to 40–60 years. The key lies in regular upkeep: consistent cleaning, using the right products, and performing routine inspections. These steps create a maintenance loop that supports the cleaning process outlined earlier.
Adding a cedar-safe sealant or water-based stain after cleaning can provide an extra layer of protection, extending the siding's lifespan by about five years. As Wash Safe explains:
"What's key is cleaning AND sealing to prolong the life of your clean and homeowners who seal get about 5 additional years of clean coverage to their results."
Routine inspections and proactive care are vital for durability. Check your siding twice a year - once in spring and again in fall - for signs of curling shakes, soft spots, or loose nails. Keep trees and shrubs at least one foot away from the siding, and make sure your gutters stay clean. Addressing issues early can save you from more significant repairs later:
"Catching these issues early allows you to replace individual shingles rather than facing a full siding replacement down the road."
Treating cedar siding maintenance as part of your seasonal routine, rather than waiting for problems to arise, makes a big difference. Regular inspections, quick fixes for minor damage, and timely reapplication of protective treatments go a long way in preserving the beauty and longevity of your cedar siding. At Downspout Services, we believe that consistent effort is the secret to keeping your siding in excellent shape for years to come.
FAQs
Can I clean cedar shake siding myself, or should I hire a pro?
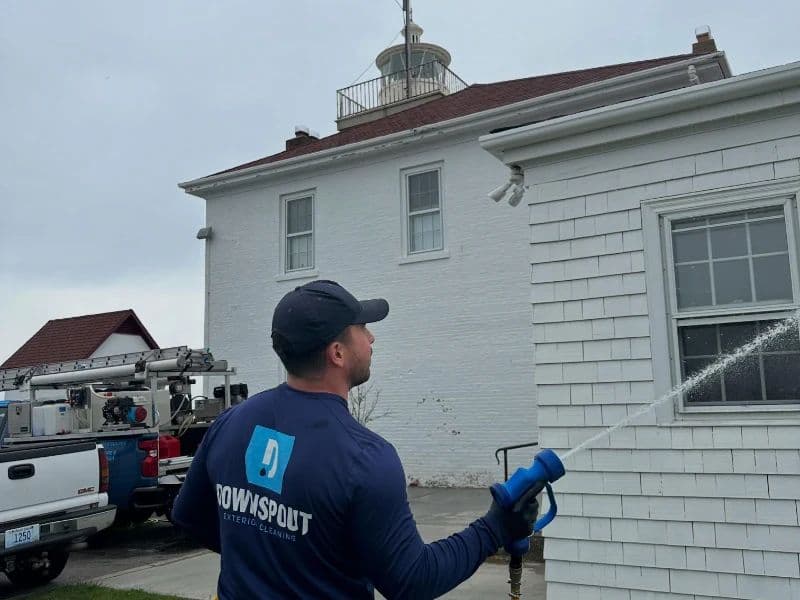
Yes, you can clean cedar shake siding on your own if you follow the right approach. Use gentle tools like a garden hose, a soft-bristle brush, and mild detergent to avoid harming the wood. Steer clear of high-pressure washers, as they can cause damage. If you're dealing with stubborn mold or widespread problems, it’s a good idea to bring in a professional. They have the expertise to clean thoroughly without compromising the siding's integrity.
How do I tell if stains are mildew or tannins on cedar?
Mildew stains typically rest on the surface and can often be addressed using a mild solution, such as oxalic acid. Tannin stains, however, result from natural discoloration within the wood itself and may need a different cleaning method. Always start by testing a small, inconspicuous area to determine the stain type and select the right cleaning technique.
What’s the safest way to clean cedar without a pressure washer?
Cleaning cedar safely without a pressure washer involves using gentle techniques that protect the wood's surface. Stick to soft brushes and a garden hose equipped with a gentle spray nozzle. For cleaning solutions, opt for eco-friendly options like cedar-specific cleaners or mild detergents. These are great for tackling moss, mold, or algae without causing harm. Steer clear of high-pressure water streams and harsh chemicals to maintain the cedar's integrity.