Deck Cleaning: 6 Steps to Restore Wood Surfaces
Six clear steps — prep, protect, apply cleaner, scrub, rinse, dry and seal — to restore and protect wood decks effectively.
Want to restore your wood deck? Here's a quick guide to bring it back to life:
-
Step 1: Prepare the Surface
Clear all items, inspect for damage, sweep debris, and clean cracks for better drainage. -
Step 2: Protect Surroundings
Cover plants, siding, and fixtures with tarps. Use plant-safe cleaners like oxygen bleach. -
Step 3: Apply Cleaning Solution
Choose the right cleaner based on your deck's needs. Apply evenly, scrub along the wood grain, and let it sit without drying out. -
Step 4: Scrub Thoroughly
Use a stiff synthetic-bristled brush to lift dirt and stains. Focus on high-traffic areas and corners. -
Step 5: Rinse and Neutralize
Rinse with a garden hose until water runs clear. Use a wood brightener if needed to restore color. -
Step 6: Dry and Restore
Let the deck dry for 24–48 hours. Sand for smoothness and apply a sealant or stain for protection.
Pro Tip: Regular maintenance, like sweeping and sealing, can extend your deck's life and keep it safe. For professional help, services like Downspout Services handle cleaning and restoration for a hassle-free experience.

6-Step Deck Cleaning and Restoration Process
Step 1: Prepare the Deck Surface
Clear the Deck
Start by removing all furniture, planters, and decorations from your deck. This ensures you can reach every part of the surface and keeps your belongings safe from cleaning solutions or tools. Clearing the area also helps reveal hidden spots that might need attention.
"Sweep your deck in the direction of the wood grain to get into all the tiny cracks and remove large debris and dust." - Jill Harness, Contributing Writer, Angi
With the deck cleared, inspect it carefully for any damage that needs fixing.
Inspect and Repair Damage
Take a walk across the deck to check for issues like soft spots or discoloration, and test the stability of the boards. If you find cracks shorter than 6 inches, fill them with flexible polyurethane caulk. For longer cracks, it’s best to replace the damaged boards. Tighten or replace any loose, protruding, or rusty nails and screws. Make sure railings are secure and can handle up to 200 pounds of pressure.
Sweep and Clean Cracks
Use a stiff broom to sweep the deck thoroughly, following the direction of the wood grain. This method helps push debris out of small cracks. For dirt stuck between the boards, grab a putty knife to scrape it out. Removing this buildup improves drainage and ensures your cleaning solution can reach every surface. Aim to clean on a dry day when temperatures are between 50°F and 90°F for the best results.
sbb-itb-634c8b2
Restore Your Deck | Make an old weathered deck look like new again
Step 2: Protect Surrounding Areas
After preparing your deck, it's time to shield the surrounding areas to prevent any unintended damage from cleaning products.
Cover Nearby Surfaces
Before applying any cleaning solution, take steps to protect nearby plants, shrubs, siding, and outdoor fixtures. Use plastic sheeting or tarps to cover these areas, but make sure the coverings are loosely draped to allow air circulation. Remove the coverings immediately after cleaning and sealing to avoid harming vegetation. If you're using a tank sprayer, be cautious to prevent overspray from landing on protected surfaces.
Whenever possible, opt for plant-safe cleaning solutions. Oxygen bleach or hydrogen peroxide-based cleaners are effective, biodegradable options that are gentler on your landscaping. Avoid chlorine bleach - it can damage wood at a cellular level and harm nearby plants. If you're tackling heavy mold with Trisodium Phosphate (TSP), take extra precautions to shield sensitive plants from exposure.
Once you've secured the surrounding area, it's time to think about your own safety.
Wear Protective Gear
Protecting yourself is just as important as protecting your surroundings. Equip yourself with gloves, safety goggles, and, if needed, a respirator to guard against chemical splashes and fumes. Knee pads can also come in handy as you work on the deck.
Step 3: Apply Deck Cleaning Solution
With your deck prepped and nearby areas protected, it’s time to apply the cleaning solution. This step is key to removing dirt, killing mold, and bringing back the natural beauty of your wood.
Choose the Right Cleaner
Picking the right cleaner depends on your wood type and the specific contaminants you’re dealing with. Here’s a quick breakdown:
- Oxygen-based cleaners (sodium percarbonate): Ideal for untreated wood and general dirt. These are plant-safe and gentle on wood fibers.
-
Sodium hypochlorite (bleach): Effective at tackling mold and mildew but requires careful dilution. As Celeste Gothorp from Carolina ProWash LLC advises:
"If you must use [bleach], only use it for what's it's good for, which is killing mold and even then, the lowest % necessary (1-3ish%)."
- Sodium hydroxide: A powerful cleaner for stubborn stains or stripping old finishes. It penetrates deep but must be neutralized immediately.
- Oxalic acid: Great for brightening weathered wood and removing tannins. It also neutralizes leftover alkaline residue.
Mike Rush from SunBrite Supply warns about overusing bleach:
"The problem comes in when [bleach] is too strong, or left to dwell too long. Then it works on the natural glue, lignin, which holds the wood fibers together."
Always test a small, hidden area first, especially on painted or stained surfaces. For new decks, wait 3–6 months before cleaning, except for cedar, which should be cleaned right away using gentler methods.
Apply the Cleaner
Follow the cleaner’s instructions for mixing. For oxygen bleach, a common ratio is 1 cup per gallon of warm water. For a stronger mix, combine 2 gallons of warm water, 2 cups of oxygen bleach, and 1/4 cup of dish soap. If using a sprayer, strain the solution through a paper cone filter to avoid clogging.
Apply the cleaner on a cloudy day with temperatures between 50°F and 85°F to prevent it from evaporating too quickly. Use a pump sprayer, paint roller, or long-handled brush for even coverage. Pre-wetting the deck with water can help the solution spread more evenly and prevent over-absorption.
Work in small sections, keeping the surface wet to avoid lap marks. After applying, use a brush to scrub the solution into the wood fibers - a method called back brushing. Always scrub along the grain to protect the wood.
Let the solution sit for 10 to 15 minutes to loosen dirt and kill mold spores, but don’t let it dry completely. If it starts drying, lightly mist the area with water to keep the cleaner active. Once the dirt and mold have loosened, you’re ready to scrub the wood and bring back its natural look.
Step 4: Scrub the Wood Thoroughly
After applying the cleaning solution, it’s time to remove the loosened grime to bring out the best in your deck. This step is all about using the right tools and techniques to clean effectively without harming the wood.
Use the Right Tools
For the best results, grab a stiff synthetic-bristled deck brush. A brush with an 8- to 10-inch head makes it easy to cover larger areas quickly, while a long handle saves your back from unnecessary strain. Stay away from wire-bristled brushes - they can scratch the wood and even cause splintering that’s hard to fix. For smaller, more detailed areas like railings, balusters, or stairs, a handheld scrub brush gives you better control.
"The secret to a truly clean wooden deck isn't about force - it's about control. A quality scrub brush gives you the power to lift away stubborn dirt without harming the wood."
- John Spitaletta, Lola Products
When scrubbing, always move parallel to the wood grain. This approach protects the wood fibers while effectively lifting out dirt. Use firm, steady pressure, but let the cleaning solution do most of the work - there’s no need to press so hard that you risk damaging softer wood types.
Focus on Problem Areas
Work in smaller sections to keep the cleaning solution from drying out. For those extra-stubborn stains, try using a baking soda paste (just mix baking soda with water). Spread it on the stain, let it sit for 15–20 minutes, and then scrub it away. Pay special attention to high-traffic spots, corners, and railings, as these areas tend to collect the most grime and mildew. An angled brush head can make it easier to reach tight spaces without overexerting yourself.
Keep in mind that cleaning your deck manually can take anywhere from four to eight hours, depending on its size and condition. Pace yourself, take breaks, and stay hydrated as you work. Once every inch of the deck has been scrubbed clean, you’re ready for the next step: rinsing off the cleaning solution to reveal the refreshed surface.
Step 5: Rinse and Neutralize
Rinse the Deck
Once you've scrubbed your deck, it's time to wash away the loosened dirt and cleaning solution. The best tool for this job is a garden hose with a spray nozzle - it gives you control and minimizes the risk of harming the wood. To avoid splintering or creating a rough, "fuzzy" texture, keep the nozzle at least 12 inches away from the surface.
Work methodically, rinsing from one end of the deck to the other. Continue rinsing until the water runs completely clear - there should be no soap bubbles, slippery residue, or traces of cleaning chemicals left behind. If the wood feels rough after rinsing, allow it to dry completely and then lightly sand it with 60–80 grit sandpaper. This step ensures the wood is clean and smooth, setting the stage for any additional treatments.
Apply a Brightener (Optional)
For decks made of redwood, cedar, or pressure-treated pine, using a wood brightener can help restore the natural beauty of the wood. These brighteners - commonly made with oxalic or citric acid - neutralize the alkaline cleaning solution and bring the wood back to its original pH and color. To apply, mix the brightener solution according to the product's instructions, which typically call for about 4 oz. of oxalic acid or 6 oz. of citric acid per gallon of water. Apply it to damp wood for the best results.
"Percarb cleaning followed by an acid brightens the wood, enhancing the oil stain finish."
- rpetry, Wood Restoration Expert
Let the brightener sit on the wood for about 10–15 minutes, as directed. Then, rinse the deck thoroughly one last time with clean water. This final rinse ensures no chemicals remain that might interfere with staining or sealing. To check if your deck is ready for a new stain, pour a small amount of water onto the dry wood. If the water absorbs and darkens the wood within 10 minutes, your deck is prepped and ready.
Step 6: Dry and Restore
With your deck now cleaned and rinsed, it's time to focus on drying and restoring it to ensure it stays in great condition for years to come. Proper drying and finishing are essential for maintaining the deck's durability and appearance.
Allow Proper Drying Time
After rinsing, give your deck 24–48 hours to dry completely - or up to 72 hours if you're dealing with high humidity. Skipping this step or rushing the process could trap moisture under the new finish, leading to issues like warping, bubbling, or even mold.
"Patience here isn't just a virtue; it's a necessity for preserving the deck's appearance and longevity."
- Lily Carter, WoodRio
Not sure if your deck is dry enough? Try the plastic sheet test: tape a small piece of plastic to the wood overnight. If there's condensation under the plastic in the morning, the wood isn't ready yet. For the best results, aim for at least three consecutive rain-free days with temperatures between 50°F and 90°F before moving forward.
Sand and Seal (Optional)
Once the deck is fully dry, consider sanding it to smooth out the surface. Use 60–80 grit for the boards and 100–120 grit for railings, always sanding along the wood grain. This not only gives a polished finish but also helps the sealant or stain absorb more evenly. If you don’t own a sander, renting one typically costs between $40 and $70 per day.
After sanding, apply a sealant or stain to protect the wood. Semi-transparent stains are a great choice for high-traffic areas since they provide UV protection while letting the wood grain shine through. On the other hand, clear sealants preserve the natural look of the wood. Allow the finish to cure for 48 hours before using the deck. For DIY enthusiasts, sealing materials usually cost between $0.25 and $1 per square foot, while hiring a professional for refinishing can range from $900 to $2,720.
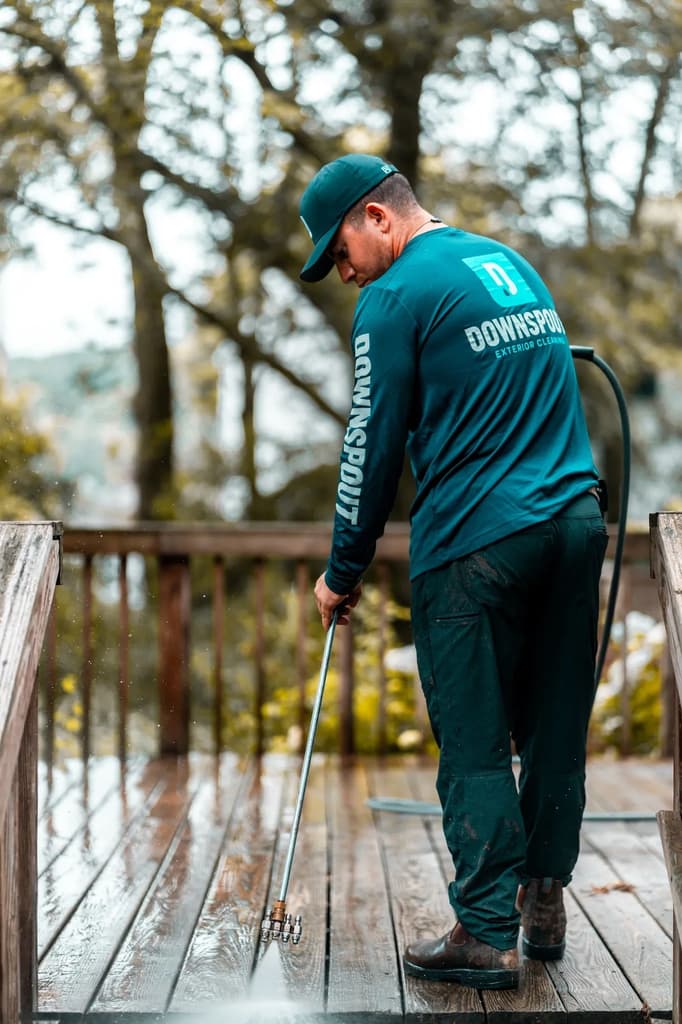
If these steps feel overwhelming or too time-consuming, you can always opt for professional services to handle the restoration process.
Professional Deck Cleaning Services
For homeowners in Rhode Island and parts of Connecticut, Downspout Services offers expert deck cleaning and restoration. Their team takes care of everything - from deep cleaning to applying finishes - so you can skip the hassle of renting equipment or spending your weekends laboring outdoors. Plus, they provide free estimates to help you budget for the project efficiently. Hiring professionals ensures a smooth, stress-free experience.
Tools and Materials You'll Need
Before diving into your deck restoration project, make sure you’ve got all the necessary tools and materials ready to go. Being well-prepared ensures your six-step cleaning process goes smoothly and efficiently.
Recommended Tools
The right tools can make all the difference when it comes to restoring your deck. Start with the basics: a broom or a leaf blower to clear away loose debris, and a plastic putty knife or screwdriver to scrape out any gunk trapped between the boards. For rinsing, a garden hose with a spray nozzle works well, or you can use a pressure washer set to 1,500 psi or lower with a fan tip to avoid damaging the wood.
When it’s time to scrub, a stiff-bristle or deck brush with a long handle will help you clean thoroughly without straining your back. A pump sprayer is handy for applying cleaning solutions evenly. If sanding and sealing are part of your plan, grab 80- to 100-grit sandpaper and either a pole sander or a power hand sander.
Don’t forget safety gear! Rubber gloves, eye protection, and knee pads are essential when working with cleaning solutions or power tools. If you’re applying sealants, consider wearing a respirator mask to protect yourself from fumes. On average, the cost for DIY deck cleaning and sealing ranges from $80 to $250.
Cleaning Solution Comparison
The cleaner you choose can significantly affect the outcome of your deck restoration. Oxygen-based cleaners, like oxygen bleach, are a great option - they effectively kill mold and mildew without altering the wood’s natural color. Plus, they’re biodegradable and non-toxic. For lighter stains or routine maintenance, vinegar and baking soda offer a safe, eco-friendly alternative that works well on all wood types.
Specialized commercial cleaners are another option, especially if you need something tailored to a specific wood or composite material. Look for labels that say "biodegradable" or "non-toxic" to ensure safety for the environment. Steer clear of chlorine bleach - it may be powerful against mold, but it weakens wood fibers and strips away its natural color.
| Cleaner Type | Effectiveness | Safety | Wood Compatibility |
|---|---|---|---|
| Oxygen-Based (e.g., Oxygen Bleach) | High – kills mold and mildew without bleaching wood color | Safe, non-toxic, biodegradable | Highly compatible; does not damage wood cells |
| Chlorine Bleach | High for mold removal but strips natural wood color | Hazardous to plants and soil | Low – damages wood at a cellular level |
| Vinegar & Baking Soda | Moderate – ideal for light stains and maintenance | Very safe, eco-friendly | High – gentle on all wood types |
| Specialized Commercial Cleaners | High – tailored for specific wood or composite types | Varies – check eco-friendly labels | High – designed specifically for deck restoration |
Conclusion
Taking a thoughtful, step-by-step approach to cleaning and restoring your deck is the key to making it last. This process not only removes mold and mildew but also brings back the wood's natural color and shields it from moisture and UV damage.
The difference between a deck that lasts a few years and one that endures for decades often comes down to regular maintenance. For example, hardwoods like Ipe can last an impressive 40 to 75 years - or even longer - when properly maintained. With consistent care, your deck can handle harsh weather, resist decay, and keep its rich, natural color. On the flip side, neglect can lead to a dull, silver-gray appearance and make the wood more prone to rot.
Simple habits like sweeping regularly, preventing standing water, and applying UV-protection treatments annually can go a long way in avoiding expensive repairs. Routine inspections are also crucial for catching small cracks or damage early, preserving both the deck's appearance and safety.
If tackling these tasks on your own feels overwhelming, hiring professionals can make the process much easier. Downspout Services specializes in expert deck cleaning across Rhode Island and parts of Connecticut. Using advanced tools and proven methods, they can bring your deck back to life. Whether you're caring for a new deck or restoring an older one, investing in proper maintenance today ensures it stays durable and beautiful for years to come.
FAQs
Should I use a pressure washer on my wood deck?
Yes, a pressure washer can help remove dirt, mildew, and stains from your wood deck. But it's important to handle it with care to avoid harming the surface. Use the correct nozzle and keep a safe distance from the wood while cleaning. If you're not confident in your technique or want to ensure the job is done right, hiring a professional is a reliable choice.
What cleaner is safest for wood and nearby plants?
When cleaning wood surfaces near plants, it's important to choose options that won't harm your greenery. Non-toxic, plant-safe cleaners are your best bet. Here are a few effective and eco-friendly choices:
- Natural solutions: A simple mix of oxygen bleach, vinegar, and baking soda works wonders. It's safe for plants, pets, and the environment.
- Hydrogen peroxide-based cleaners: These are another gentle yet effective option.
- Plant-safe labeled products: Look for cleaners that specifically mention they're safe for use around plants.
Always read and follow the product instructions to ensure you're protecting both your plants and the environment.
How do I know the deck is dry enough to stain or seal?
Wait about 48 hours after washing your deck to let it dry completely. It's important to ensure the wood is fully dry, clean, and free of any moisture before applying a stain or sealant. This step is crucial because proper drying allows the stain or sealant to bond well with the surface, improving its effectiveness and extending the life of your deck.