Hanging Christmas Lights Without Damaging West Greenwich Homes
Inspect surfaces, use fitted gutter/shingle/trim clips, route cords to GFCI outlets, and remove lights without damaging your home.
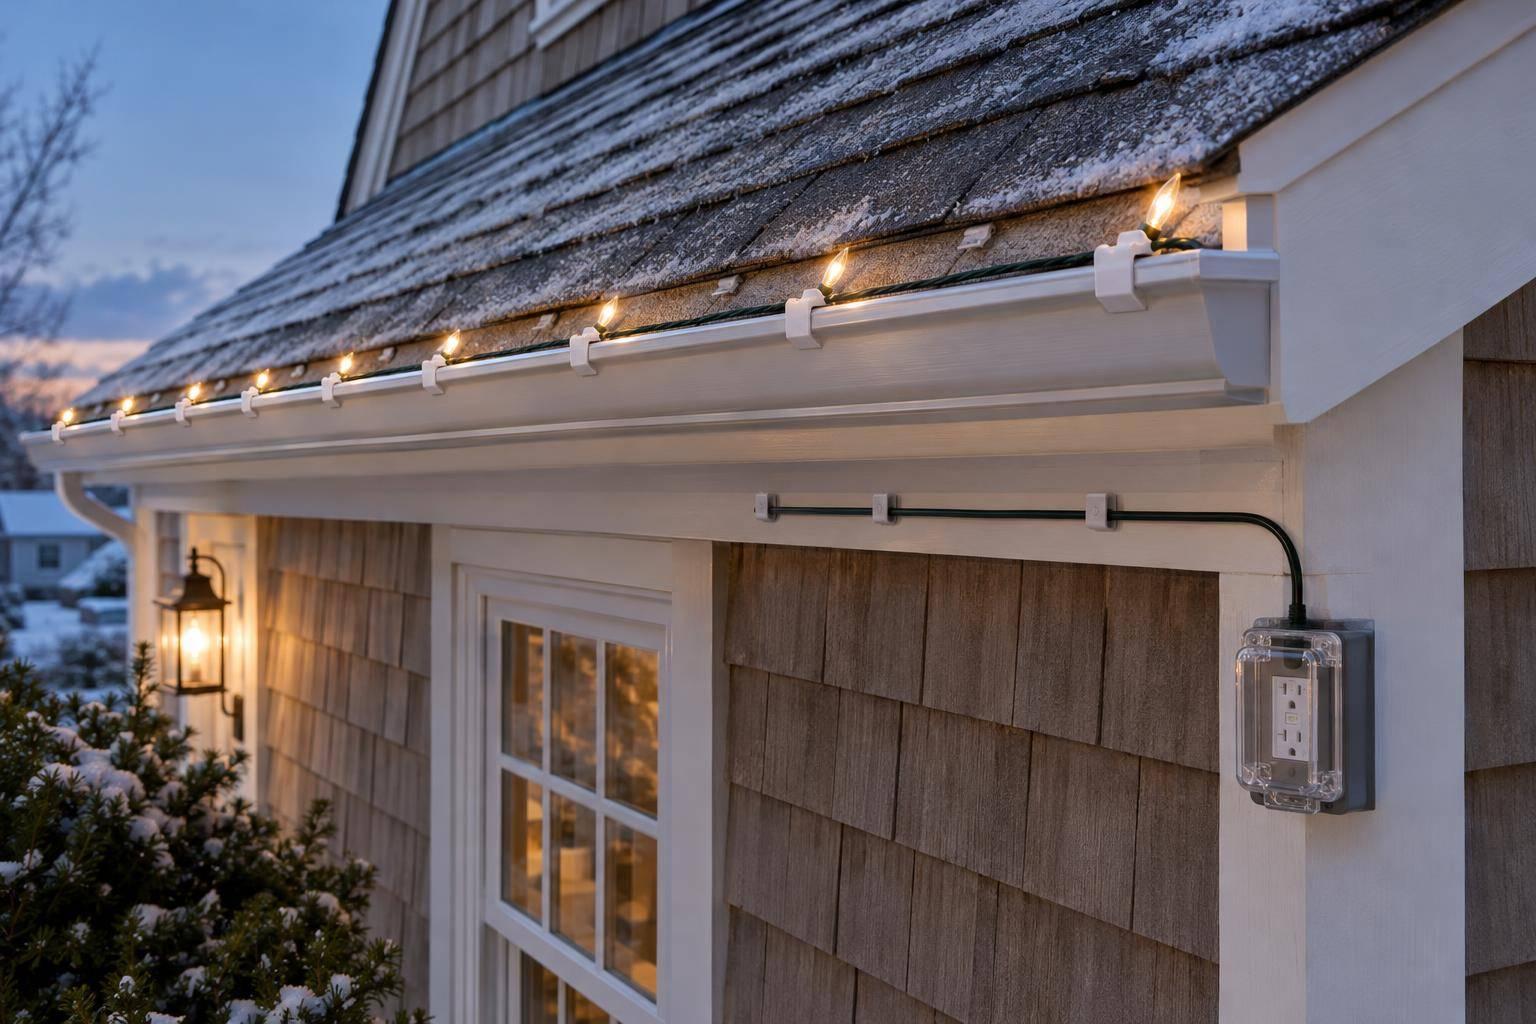
To hang Christmas lights without damaging your West Greenwich home, check the surfaces first or schedule professional exterior cleaning and use clips that fit without force. Test 1–2 clips before hanging a full strand, and leave cracked trim, loose gutters, and brittle shingles untouched.
Choose gutter, shingle, or trim clips made for your attachment surface. Keep lights unplugged while hanging, route outdoor-rated cords away from walkways, and use a GFCI-protected outdoor outlet.
Plan for removal, too: unplug the lights and release each clip without pulling or prying. <u>If access is unsafe or power needs repair, stop and get qualified help.</u>
Start with a ground-level check of your attachment points and power access.
Hang Christmas Lights Without Damaging Your Home
Choosing the Best Clips for Christmas Light Installation
sbb-itb-634c8b2
Inspect Attachment Surfaces and Power Access
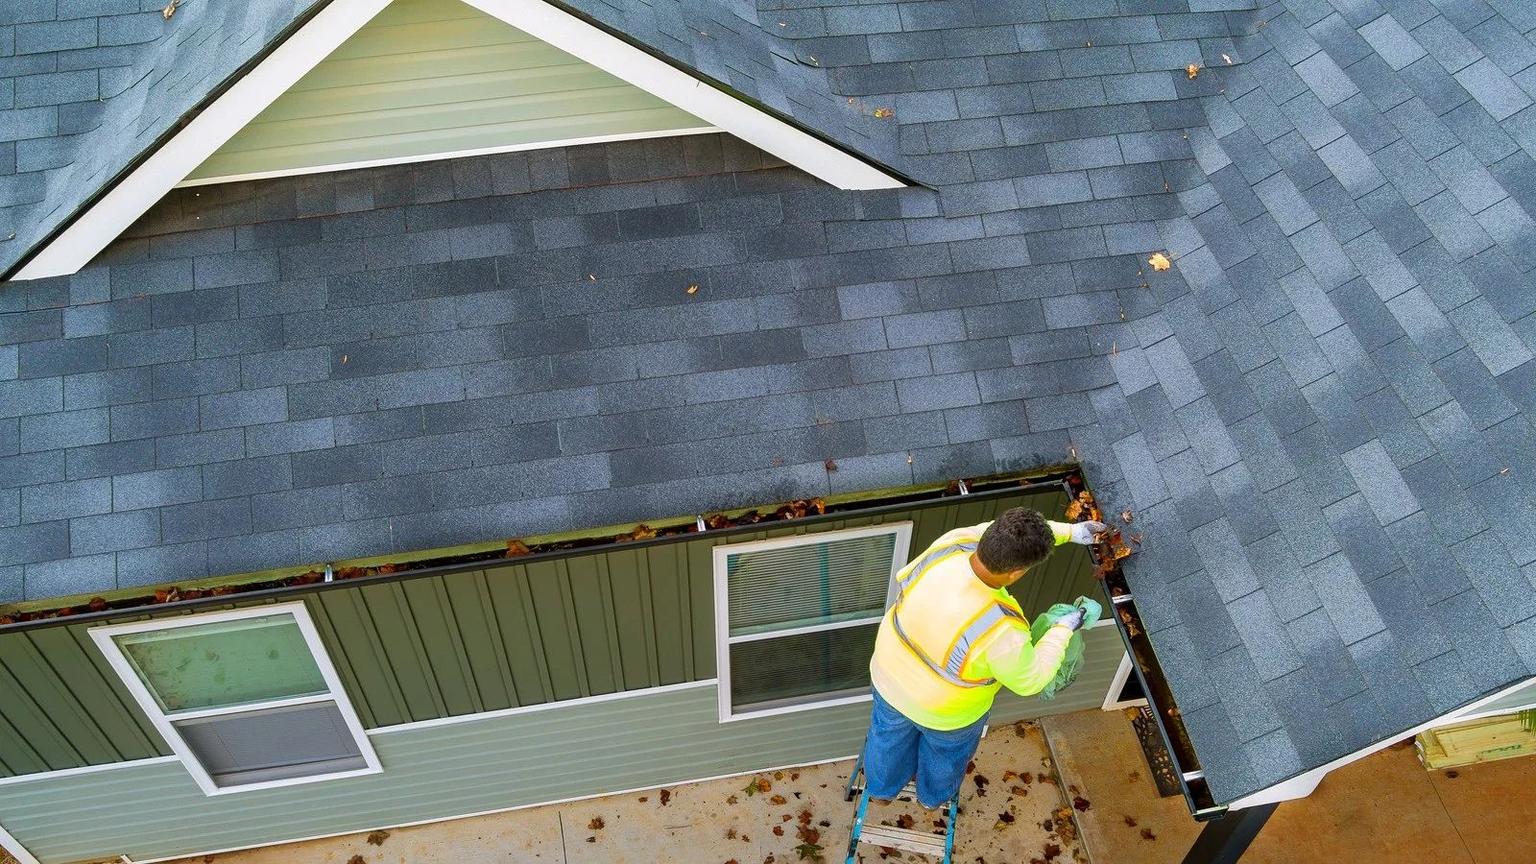
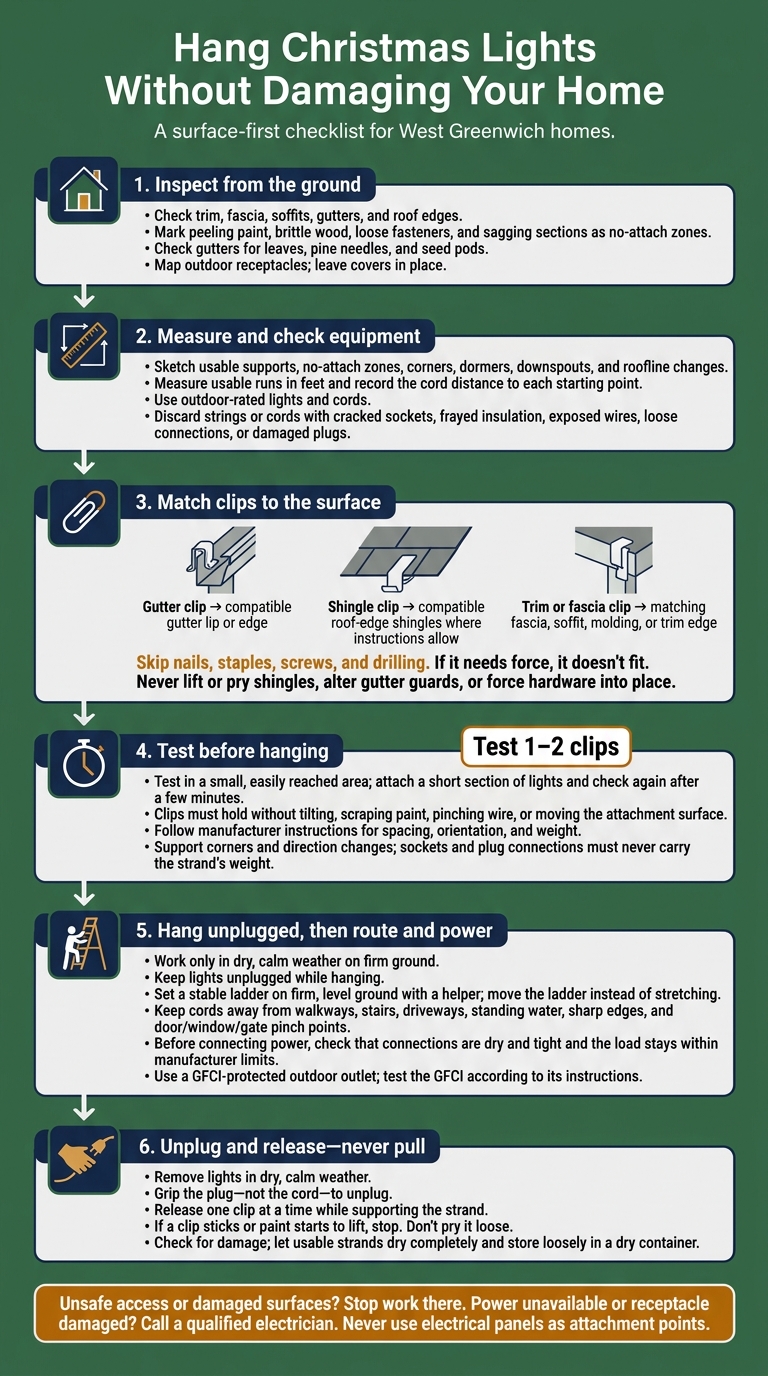
Inspect trim, fascia, soffits, gutters, and roof edges from the ground. Look for peeling paint, brittle wood, loose fasteners, and sagging sections. Mark damaged areas as no-attach zones. On wooded West Greenwich properties, check gutters for leaves, pine needles, and seed pods before choosing clip locations.
Identify usable supports and power starting points. These checks help you see where standard clips will fit and where older trim calls for another attachment method.
How Pre-War Trim and Power Access Differ From New Builds
A home’s age can suggest what to look for, but it doesn’t tell you whether attachment points or wiring are safe. Inspect the house before choosing how to attach lights. On West Greenwich’s older homes, trim profiles and receptacle placement may change your installation plan.
| Inspection area | Pre-war homes may have | Newer homes may have | Installation adjustment |
|---|---|---|---|
| Trim profiles | Layered paint, narrow fascia, decorative molding | More uniform dimensions | Match clips to each profile without forcing |
| Gutters and roof edges | Uneven edges, older repairs, sagging sections | Straighter edges, but possible damage or debris | Plan clip locations around usable sections |
| Outdoor receptacles | Fewer receptacles or less convenient placement | More accessible receptacle locations | Map receptacles before choosing starting points |
| Light runs | More interruptions between suitable supports | Longer stretches of consistent surfaces | Shorten or divide runs where needed |
Record receptacle locations and visible damage, but leave covers in place. Do not use electrical panels as attachment points or judge wiring condition by the construction date. If power access is poor, stop and have a qualified electrician assess it rather than stretching cords.
Measure Rooflines and Test Lights
Use your walkaround notes to sketch usable supports, no-attach zones, and outdoor receptacles. Measure each usable run in feet, and mark corners, dormers, downspouts, and roofline changes. Record the cord distance to each starting point - not just the length of the edge you plan to decorate. Follow the method in How to Measure Your Roofline for Christmas Lights.
Before plugging anything in, inspect every strand and extension cord at ground level. Check for outdoor-use labels. Discard strings or cords with cracked sockets, frayed insulation, exposed wires, loose connections, or damaged plugs. NFPA recommends inspecting holiday lighting and replacing damaged strings or cords.
Choose Clips That Fit Without Force
After checking the surface, match each clip to the trim, gutter, or shingle it will touch. Choose plastic clips sized for both the surface and the light string’s weight. Skip nails, staples, screws, and drilling. Holes can damage materials and let moisture in.
Compare Gutter, Shingle, and Trim Clips
Choose clips by how they attach, not by a “universal” label. Older West Greenwich homes often have a mix of trim and roof-edge profiles, so you may need more than one clip type.
| Clip type | Suitable surface | Attachment method | Damage risks | Limitations |
|---|---|---|---|---|
| Gutter clip | Compatible gutter lip or edge | Snaps or hooks over the gutter edge without drilling | Can bend thin edges or pull on loose gutters if overloaded | Guards, thick lips, and uneven edges may block a proper fit; avoid loose or damaged gutters |
| Shingle clip | Compatible roof-edge shingles where instructions allow | Slides under or grips the shingle edge without lifting it | Can disturb brittle, aged, curled, or sealed shingles if forced | Must fit freely without lifting or prying |
| Trim or fascia clip | Matching fascia, soffit, molding, or trim edge | Clips onto the edge or lip | Can mark soft surfaces, peeling paint, or new paint | May slip from narrow, thick, uneven, or decorative trim |
If it needs force, it doesn’t fit. Don’t bend clips, alter gutter guards, or wedge hardware into place. If a shingle clip won’t fit freely at the roof edge, use a compatible gutter or trim clip - or change the layout.
Test Clip Fit and Support Light Runs
Test one or two clips in a small area you can reach easily. Each clip should stay seated without tilting, scraping paint, or pinching the wire. Attach a short section of lights, then check again after a few minutes. The clips should hold steady without moving the surface they’re attached to. Remove them if you spot any of these problems.
Follow the light and clip manufacturers’ instructions for spacing, orientation, and weight. Support corners and changes in direction so sockets and plug connections never carry the strand’s weight. Leave a little slack near corners and the power end, but avoid large loops. When you lift the cord slightly between supports, it shouldn’t pull the clips sideways. See How Hanging Christmas Lights Can Damage Gutters for more on preventing pulling and distortion.
Once the clips hold without shifting or damaging the surface, route the cord before powering the strand.
Install Lights and Route Cords Safely
Install only in dry, calm weather on firm ground. Once you’ve confirmed the clip fit, hang each run and route the cords. Postpone the job if there’s frost, ice, rain, snow, strong wind, wet roofing, or unstable ground.
Prepare Lights Before Hanging
Use lights and cords rated for outdoor use. Lay out each planned section near its intended power source. When practical, clip the lights together on the ground, and keep them unplugged while hanging.
Follow the receptacle locations and no-attach zones you’ve already mapped. Older trim and closely spaced receptacles may limit where each run can start.
Set a stable ladder on firm, level ground, with a helper steadying it and passing materials. Start at the power end and work outward in sections. Move the ladder instead of stretching around uneven trim or older roof edges. Never use loose gutters, deteriorated fascia, or decorative trim for support.
At corners, downspouts, and trim changes, pause to check the cord’s path. Once the strand is in place, route the cords.
Keep Cords Away From Walkways and Pinch Points
Run cords along clear, protected paths, away from stairs, driveways, standing water, and sharp edges. Don’t squeeze them through doors, windows, or gates, or leave connections where runoff collects. If a cord would cross a path, reroute it to avoid a trip hazard.
Before connecting power, check that connections are dry and tight and that the connected load stays within the manufacturer’s limits. Use a GFCI-protected outdoor outlet, and test the GFCI according to its instructions and NFPA guidance.
If power is unavailable or a receptacle is damaged, stop and call a qualified electrician. Leave wiring changes, receptacle replacement, and panel work to a qualified electrician.
Remove Lights Without Damage and Know When to Get Help
Unplug Lights and Release Each Clip
When the season ends, take the same care removing your lights as you did installing them.
Wait for dry, calm weather. Turn the lights off, then unplug them by gripping the plug - not the cord. Release one clip at a time, supporting the strand so its weight doesn’t pull on the next clip.
If a clip sticks or paint starts to lift, stop. Don’t pry it loose. Once the lights are down, check for loose gutter parts, disturbed shingles, and chipped paint. Set damaged strands aside for disposal. Let usable strands dry completely, then store them loosely in a dry container, away from sharp bends and heavy objects.
If you find damaged trim, loose gutters, or areas you can’t reach safely, stop work there.
Request an Estimate for Your Property
If fragile trim, irregular rooflines, or tight ladder access make removal difficult, request professional Christmas light hanging. Fragile trim and loose gutters call for a removal plan that fits your house - not hardware forced into place.
Ask for an assessment of attachment surfaces, clip fit, cord paths, and how the lights will be removed. Check West Greenwich service coverage, then request an estimate for Christmas light installation.
FAQs
Can I hang Christmas lights on freshly painted trim?
Yes, but avoid nails, staples, or screws in pre-war or newly painted trim. The holes can let moisture in and cause damage to develop faster.
Instead, use plastic or vinyl gutter or roof-edge clips that grip without piercing the surface. Removable clips made for trim can also help protect the finish. If the trim feels soft or the mounting surface isn’t secure, inspect it and fix the problem before attaching lights.
What if no clips fit my older home's trim?
If standard clips don’t fit your older home’s trim, skip nails, staples, and screws. These punctures can let moisture in, which can lead to rust or rot. Choose a mounting method that suits the surface:
- Metal trim: Try magnetic hooks where plastic clips won’t work.
- Delicate slate or cedar roofing: Use specialty clips.
- Smooth siding: Outdoor-rated adhesive hooks may work if you apply them when the surface temperature is between 50°F and 90°F.
What should a professional Christmas light installation estimate include?
A professional Christmas light installation estimate should put the details in writing: itemized costs, preferred installation and removal dates, selected lighting materials, and every area covered, including rooflines, entryways, and trees.
It should also confirm the design, secure installation with clips - not nails or staples, seasonal maintenance and testing, and scheduled takedown. Pricing should account for access conditions, roof height, and add-ons such as storage.