Spring Cleaning Checklist for Homeowners
Room-by-room spring cleaning checklist with HVAC, appliances, kitchen, bathroom, gutters, roof and outdoor tasks to prevent damage and improve home health.

Spring cleaning is more than just tidying up - it's about maintaining your home, preventing costly repairs, and creating a healthier space. This checklist covers everything you need, from indoor tasks like decluttering and HVAC maintenance to outdoor jobs like gutter cleaning and roof inspections. Key highlights include:
- Declutter and Organize: Use the three-box method (sell, donate, trash) to simplify your spaces.
- Deep Clean Appliances: Clean refrigerator coils, oven interiors, and dryer vents to improve efficiency and safety.
- Dust and Vacuum Thoroughly: Focus on high and low surfaces, including ceiling fans, baseboards, and upholstery.
- HVAC Care: Replace air filters every 1–3 months and clear debris around outdoor units.
- Kitchen and Bathroom: Disinfect cutting boards, clean grout, and check plumbing for leaks.
- Exterior Maintenance: Wash windows, clean siding, clear gutters, and inspect your roof for damage.
- Outdoor Spaces: Clean decks, patios, and furniture; repair cracks in driveways; and prune shrubs.
Tackle these tasks systematically to prepare your home for the warmer months while avoiding future headaches. Whether you handle it yourself or hire professionals, starting now ensures your home is safe, clean, and ready for spring.

Complete Spring Cleaning Checklist for Homeowners - Interior and Exterior Tasks
Spring Cleaning Checklist for Your Home - My Top 10
sbb-itb-634c8b2
Tools and Supplies You'll Need
Keeping your supplies in a portable caddy or bucket can make a world of difference. It allows you to move easily between rooms, saving time and helping you stay focused on the task at hand.
Basic Cleaning Tools
Make sure you have the essentials: microfiber cloths for electronics and glass, a vacuum with crevice and upholstery attachments, and a wet/dry mop. For those hard-to-reach spots like ceiling fans or light fixtures, an extendable duster is a must. Outdoor cleaning might require a pressure washer for siding and driveways, a sturdy ladder, a leaf blower with gutter kit attachments, and wire brushes for grills.
To keep things hygienic, consider color-coding your tools. For instance, use red microfiber cloths for bathrooms and blue ones for kitchens. This simple system helps prevent cross-contamination between different areas of your home.
Cleaning Products to Use
Stock up on versatile, non-toxic products like white vinegar, baking soda, and dish soap. You can even mix your own all-purpose cleaner by combining equal parts water and white vinegar with a few drops of dish soap. For tougher messes, keep items like oxygen-based bleach, hydrogen peroxide, and rubbing alcohol on hand. Melamine sponges are fantastic for removing scuff marks and stubborn stains.
If you're making your own cleaning solutions, always label spray bottles with the contents and usage instructions to avoid any confusion or accidents. One important tip: avoid using vinegar on natural stone surfaces like granite, as the acidity can cause damage.
Safety and Protective Equipment
Safety first! Reusable gloves and masks are essential when working with cleaning chemicals or dealing with allergens. For outdoor tasks like cleaning gutters or inspecting the roof, start by using binoculars to assess the situation from the ground - this can help you avoid unnecessary ladder climbs. If you do need to use a ladder, make sure it's stable and have someone act as a spotter for added safety.
While you're at it, test your smoke and carbon monoxide detectors. Replace the batteries once a year and swap out detectors that are more than 10 years old to ensure your home is safe during your cleaning routine.
With everything prepped and ready, you're now set to tackle the interior cleaning checklist.
Interior Cleaning Checklist
Systematically refreshing your home, room by room, can make spring cleaning a lot less daunting. A methodical approach ensures you stay on track without feeling overwhelmed.
Decluttering and Organizing Spaces
Start by sorting through your belongings before adding new storage solutions. As Laura Price, Founder and Creative Director of The Home Organisation, puts it:
"Spring cleaning is more than just the general cleaning and tidying we do week-to-week. It also doesn't just relate to cleaning; it could be decluttering, organizing or making home improvements - anything that will make a big change in our homes and to our lives."
One way to simplify the process is by using the three-box method. Create one box for items to sell, another for donations, and a third for trash. If you’re unsure about keeping something, apply the one-year rule - if you haven’t used it in the past 12 months, it’s probably time to let it go. For areas that feel overwhelming, like junk drawers or under-sink cabinets, set a timer and tackle them in short bursts.
In the kitchen, consider purging duplicate utensils and cookware you haven’t touched in six months. Check your pantry for expired items and organize reusable containers by size to maximize space. In the bedroom, rotate your mattress 180 degrees every six months to ensure even wear, and swap out winter clothes for summer ones, storing off-season items in clearly labeled bins. If you have kids, involve them in tidying up the playroom - hard plastic toys can even be sanitized in the dishwasher’s top rack. Don’t forget to clean out the medicine cabinet, safely disposing of expired medications. Only flush medications if the label specifically instructs you to do so.
Once your spaces are organized, move on to clearing surface dust for a cleaner, fresher home.
Dusting and Vacuuming
Dusting from top to bottom prevents particles from resettling on already-cleaned surfaces. Start with ceiling fans by slipping a pillowcase over each blade and pulling it back to trap dust. Then move on to light fixtures, shelves, and the tops of picture frames before tackling lower areas like baseboards, door frames, and window tracks.
Microfiber cloths work best for this task - dampen one with water or a vinegar solution to trap dust more effectively. For stubborn debris in sliding door or window tracks, loosen it with a small brush before vacuuming with a crevice tool. According to Allen Rathey, Director of the Indoor Health Council:
"Less airborne and resettling dust cuts down respiratory exposure, overheating of electronics, HVAC maintenance, clogging of air purifiers and household dusting."
Don’t stop at the floors when vacuuming - use the upholstery attachment to clean sofas, curtains, and mattresses, reducing allergens in the process. To freshen up your mattress, sprinkle baking soda over it, let it sit for 30–60 minutes, and then vacuum thoroughly. Moving furniture and rolling up rugs can also expose hidden dust bunnies. For carpets, professional cleaning every 12 to 18 months helps maintain warranties and extends their lifespan.
Once surfaces and fabrics are spotless, focus on keeping your home’s systems in top shape.
HVAC System Maintenance
A truly clean home relies on well-maintained systems, not just tidy surfaces. Replace air filters every 1–3 months to keep your HVAC system running efficiently - clogged filters can increase energy use by 15%. To check if a filter needs replacing, hold it up to a light. If little or no light passes through, it’s time for a new one.
Clear debris like leaves and dirt from around your outdoor condenser unit, ensuring at least a two-foot clearance for proper airflow. Indoors, clean supply and return vents with a vacuum or damp cloth to remove dust and pet hair, improving your air quality.
For the condensate drain, pour white vinegar through it to prevent algae and mold buildup. If water doesn’t drain while your AC is running, the line may be clogged and needs attention. Use a separate thermometer to verify your thermostat’s accuracy, and consider upgrading to a programmable model to manage energy use more effectively. A well-maintained HVAC system can cut energy bills by up to 30% and extend its lifespan by 5–10 years.
Kitchen and Bathroom Cleaning
After tackling general interior cleaning, it’s time to focus on areas that see the most action - your kitchen and bathroom. These spaces can quickly build up grime and bacteria, so they require extra care. Microbiologist Dr. Charles Gerba from the University of Arizona highlights the importance of proper cleaning, noting, "In most cases, it's safer to make a salad on a toilet seat than it is on a cutting board" due to bacteria levels. This makes these areas a top priority during your spring cleaning.
Kitchen Cleaning Steps
Start in the kitchen by emptying the refrigerator. Toss out expired food, and wash the shelves and drawers in warm soapy water. Don’t forget the cooling coils - vacuuming these, located behind or beneath the fridge, can improve efficiency. For the door seals, use a toothbrush or a butter knife wrapped in a cloth to clean out hidden mold.
Next, tackle the oven. Soak removable parts in hot, soapy water. For the interior, apply a baking soda paste (avoiding the heating elements) and let it sit for 12 hours. Then, wipe it down with vinegar for a thorough clean. Steam-clean the microwave by boiling a bowl of water with lemon halves, which softens stuck-on food for easy removal. Clean the dishwasher filter, door seals, and drain trap, then run a hot vinegar cycle to freshen it up.
Countertops need special attention, too. Clear everything off and disinfect according to the material:
- For granite, soapstone, or wood, use diluted bleach and rinse thoroughly.
- Use disinfectant spray for laminate or marble.
- A mix of rubbing alcohol and water (1:4 ratio) works well for quartz.
Scrub your sink with baking soda. To freshen the garbage disposal, grind a mix of baking soda, vinegar, and lemon peels. Move large appliances to clean the hidden floor space where crumbs and grease tend to gather. Don’t skip the tops of cabinets - grease and dust collect there over time. As Kadi Dulude, owner of Wizard of Homes, advises, "It's important to clean those [cabinet tops] once or twice a year before your kitchen starts smelling funky and you won't know what's causing it."
Bathroom Cleaning Steps
For the bathroom, start with the shower and tub. Apply cleaning solutions and let them sit for 20–30 minutes for maximum effectiveness. Use a powder cleaner paste for porcelain tubs, while acrylic tubs require a gentler baking soda and vinegar solution.
Showerheads can be cleaned by filling a plastic bag with vinegar, securing it around the fixture with a rubber band, and letting it soak. Scrub grout lines with a bleach-based cleaner and a detail brush to remove mildew and soap scum. For mirrors, use glass cleaner and a microfiber cloth, wiping from top to bottom and side to side for a streak-free shine.
Disinfect high-touch areas like faucet handles, toilet flush levers, doorknobs, light switches, and towel bars. Exhaust fan covers should be submerged in soapy water, and the motor should be vacuumed to prevent dust buildup and mold growth. Finally, disinfect your cleaning tools - soak brushes and sponges in a bucket of hot water with one cup of chlorine bleach for 15 minutes.
Plumbing and Drain Checks
Keep your plumbing in check by flushing drains with one cup of white vinegar twice a month to prevent clogs and odors. While cleaning, inspect areas under sinks and around the base of the toilet for any signs of leaks or water damage. Fixing small issues now can save you from expensive repairs later. Make sure faucets shut off without dripping and test toilet flush mechanisms to ensure they’re working smoothly.
With your kitchen and bathroom refreshed and spotless, you’ll be ready to move on to sprucing up your home’s exterior.
Exterior Cleaning and Maintenance
Now that your home's interior is spotless, it's time to focus on the exterior. Spring brings its share of challenges - pollen, dirt, and debris from winter can pile up. Tackling these tasks early not only makes your home look better but also helps avoid expensive repairs down the road.
Window and Siding Cleaning
Start with your siding, and save the windows for last to avoid dirtying freshly cleaned glass. Before you begin, close windows and vents and cover nearby plants with plastic or fabric to shield them from cleaning solutions.
For vinyl siding, use a garden hose to loosen surface grime. Then, apply a mix of 70% water and 30% white vinegar with a pump sprayer. According to the Vinyl Siding Institute, it's best to clean from the bottom up to avoid streaks. For tough spots, use a soft-bristle brush to scrub textured areas, and rinse thoroughly. Avoid using a pressure washer on wood siding or roofs, as the intense force can damage shingles or wood surfaces.
When cleaning windows, start by rinsing them with a garden hose to remove dust and pollen. Use a microfiber cloth dipped in soapy water or a 50/50 water and white vinegar mix to scrub the glass. Dry with a squeegee or crumpled newspaper for a streak-free shine. Work on shaded areas to prevent the cleaning solution from drying too fast. Don’t forget the screens - remove them, scrub with soapy water, rinse, and let them dry before reinstalling. Small holes can be patched with adhesive mesh if needed.
Once your windows and siding are sparkling, it’s time to check on your gutters to ensure proper water drainage.
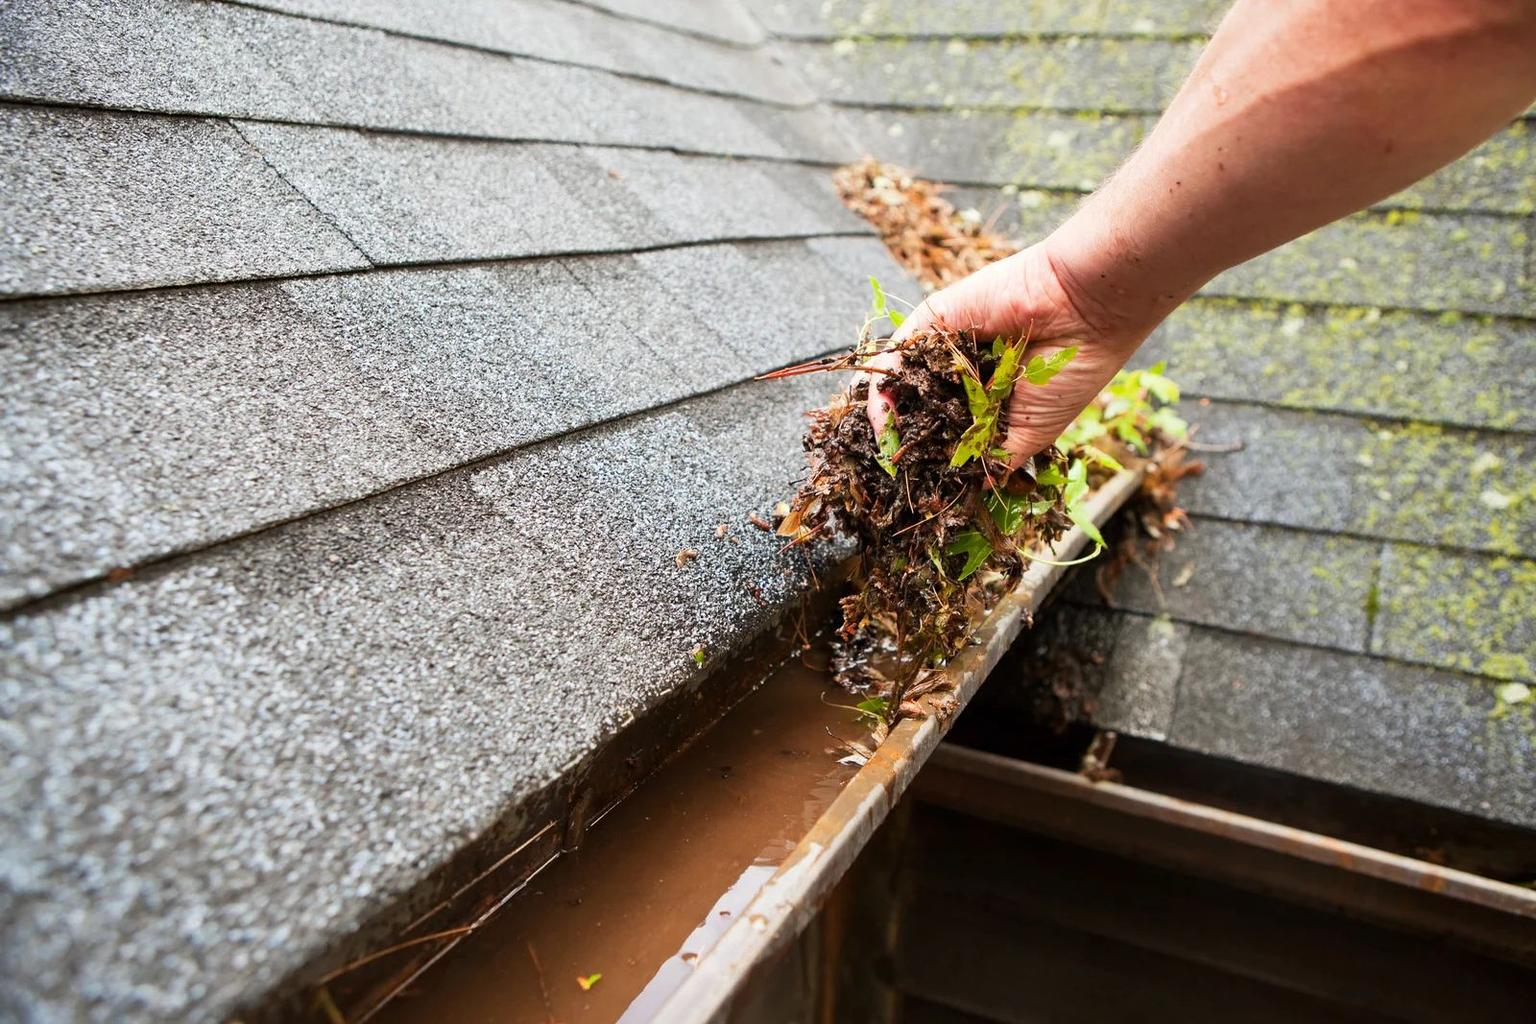
Gutter Cleaning and Maintenance
Gutters play a key role in protecting your home by directing rainwater away from the roof, siding, and foundation. When clogged, water can overflow, causing leaks, wood rot, or even structural damage. Gary McCoy, a Lowe’s store manager, suggests cleaning gutters twice a year - spring and fall - or every three months if your home is surrounded by trees.
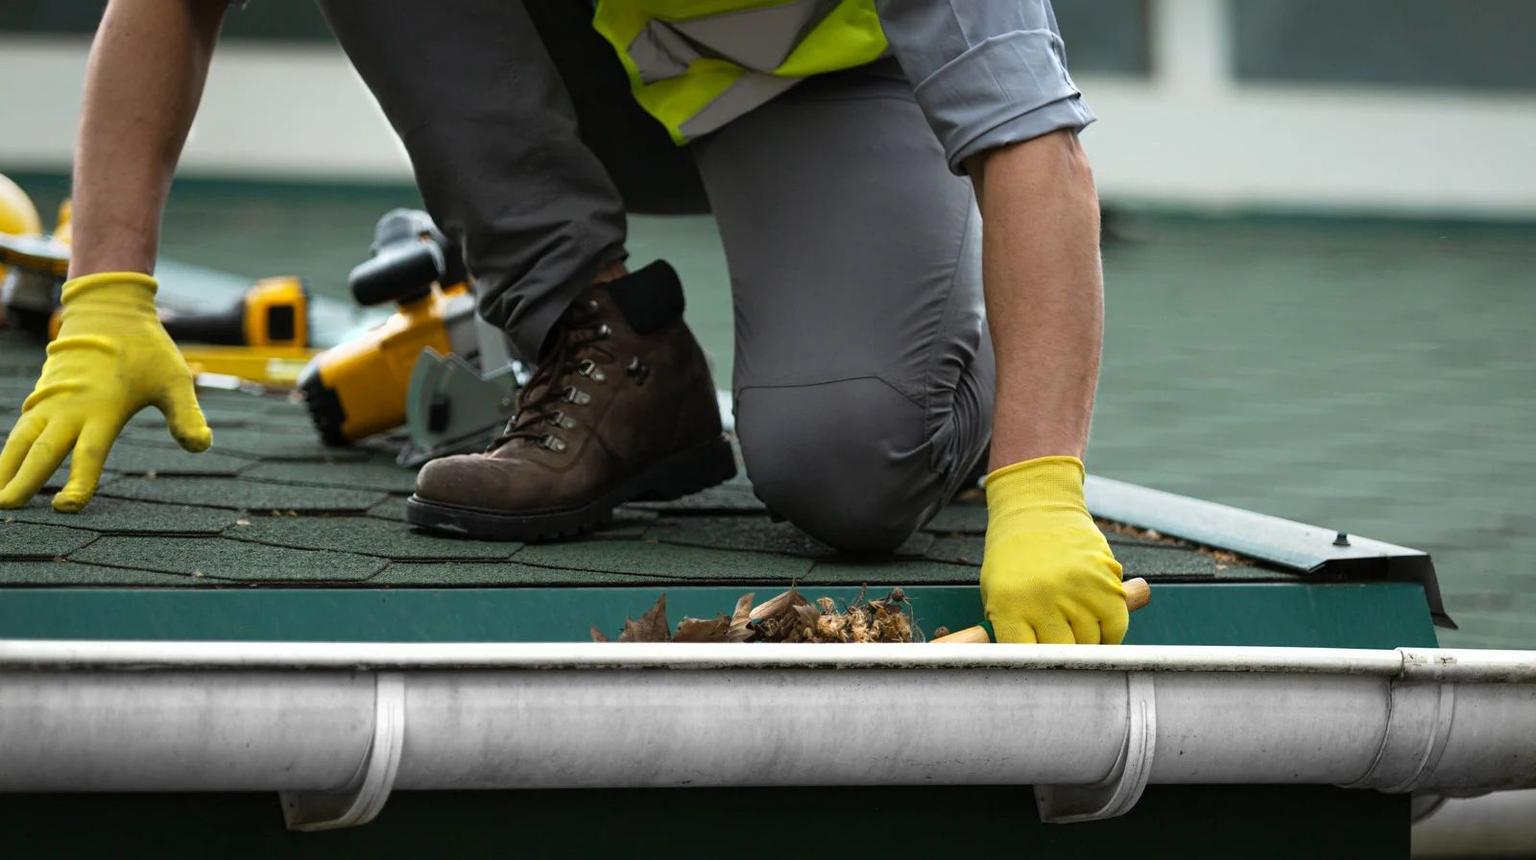
Set your ladder on stable ground and use a stabilizer to prevent damage to the gutters. Wear gloves to protect your hands from sharp debris and bacteria, and wear goggles to guard against splashes.
Use a gutter scoop or trowel to remove leaves and debris, placing it into a bucket as you go. Follow this by flushing the gutters with a garden hose, starting at the end furthest from the downspout to push debris toward the drain. If water doesn’t flow freely, use a plumbing snake or feed the hose into the downspout at full pressure to clear blockages.
While cleaning, check for rust, holes, or sagging sections. Use a flashlight to inspect seams and joints for gaps. Once the gutters are dry, seal small cracks with silicone and tighten loose brackets. Make sure downspout extensions direct water at least 3 to 5 feet away from the foundation to avoid basement flooding.
With your gutters clear and functioning, finish up by inspecting your roof to prevent water damage.
Roof Inspection and Maintenance
A thorough roof inspection is essential to catch any issues from winter before they escalate. Start by examining your roof from the ground with binoculars to avoid unnecessary risks.
Look for missing, curled, or cracked shingles, which often result from freeze-thaw cycles. GP Martini Roofing warns, “Each missing shingle is like an open door, inviting water to seep in and create a potential for leaks that can cause extensive damage to your home's interior.” Also, check for excessive shingle granules in your gutters - these granules protect the roof, and their loss could mean it’s time to start planning for a replacement.
Inspect metal flashing around chimneys, skylights, and vents for rust, gaps, or damaged caulking. Pay attention to sagging areas, which might indicate structural stress from snow. Inside your attic, look for damp insulation, water stains, or mold - clear signs of a leak. Ensure ridge and soffit vents are clear of debris and nests to allow proper airflow.
Trim overhanging branches to prevent them from scraping shingles or falling during storms. If moss or algae is present, use a soft wash vs pressure wash comparison to choose the best method to clean it, as high-pressure washing can damage shingles. For major issues, it’s wise to call a professional. With regular care, you can extend the life of your roof by several years.
Outdoor Spaces and Property Inspection
With your home's exterior cleaned and maintained, it's time to shift focus to outdoor living areas and the surrounding property. Winter weather often leaves behind hidden damage, so inspecting early can help you avoid expensive repairs. Taking care of these spaces now ensures your entire property stays in great shape.
Patios, Decks, and Driveways
Start by inspecting outdoor surfaces for cracks, loose boards, or wood rot. Once you've checked for damage, clear away debris like leaves, dirt, and grass clippings using a broom or leaf blower.
- Concrete Surfaces: Use a pressure washer or a baking soda solution to clean moss and stains. Pull out weeds from cracks, patch them with a concrete resurfacer, and apply a latex asphalt sealer for added protection.
- Wood Decks: Be gentle. Scrub with a deck cleaner or use a pressure washer on a low setting to prevent splintering. Test if your deck needs resealing by spraying water on it - if the water soaks in, it's time to reseal. Let the wood dry completely before applying stain or sealant.
-
Stone or Paver Surfaces: Clean with a mild detergent and a pressure washer. Start with low pressure and keep the nozzle at least 10 inches away to avoid damage. Joe Raboine, Director of Residential Hardscapes at Belgard, warns:
He also highlights the importance of maintaining the jointing sand between pavers to prevent shifting:"Be careful with this handy tool [pressure washer], as it can cause damage to some materials."
"For hardscaped areas, the jointing between the pavers is the most vulnerable. Keep these joints topped off with jointing sand to prevent the sand-bedding layer below from deteriorating, causing the pavers to shift."
If you'd rather leave the heavy cleaning to the pros, professional power washing services typically cost around $280. When working near plants, opt for oxygen bleach instead of regular bleach to protect your landscaping.
Once the hard surfaces are clean, turn your attention to landscaping and yard maintenance.
Yard and Landscaping Cleanup
Inspect your yard for damage caused by winter. Check trees and shrubs for broken branches or cracks in the trunks. Walk your lawn to spot bare patches, areas of thatch, or snow mold. Make sure the ground is dry before raking to avoid harming healthy roots.
- Pruning Tips: Timing is key. Trim summer-flowering shrubs like roses and hydrangeas in early spring before new growth begins. For spring-flowering shrubs such as lilacs and azaleas, wait until after they bloom to preserve this season's flowers.
- Weed Prevention: Apply pre-emergent herbicides when the top inch of soil reaches 55°F for five consecutive days, usually in March or April. This helps prevent weed seeds from sprouting.
- Address Low Spots: Look for areas where water pools, as these can attract mosquitoes and create swampy conditions. Add soil and compact it to create a slope that directs water away from your home's foundation.
Before mowing, inspect your lawn equipment. Sharpen mower blades, change the oil and spark plugs, and charge batteries. If you're considering a "No-Mow May" approach to support pollinators, remember Catherine Boeckmann's advice:
"A little leaf litter helps our pollinators and wildlife survive the winter."
Finish up by inspecting and cleaning your fencing and outdoor furniture.
Fencing and Outdoor Furniture
Different fencing materials require different care. Vinyl fences can be cleaned with a soapy sponge, while wood fences need scrubbing along the grain with a mild detergent. Ben Soreff from House to Home Organizing explains:
"The fencing material will determine how you approach cleaning."
Clear debris from the base of the fence to prevent moisture damage. Check wooden fences for decay and metal fences for rust or corrosion.
For outdoor furniture, use warm water, mild soap, and a soft brush to clean surfaces. Rinse thoroughly with a garden hose and let everything air-dry to prevent mildew. Ben Soreff advises:
"Make sure to air-dry the pieces completely to prevent mildew growth."
For upholstered furniture, use a wet/dry vacuum to remove dirt, and consider steam cleaning to eliminate mold spores. Jade Piper, Operations Manager for BetterCleans, suggests:
"To get rid of mold and mildew, mix equal parts water and oxygen bleach (not regular bleach, which can damage plants) and scrub the affected areas."
Inspect furniture for cracks, holes, or rust that might need repair. For stubborn rust on metal pieces, use specialized cleaners or scrubbing tools.
Once your outdoor spaces are clean and inspected, you'll be ready to enjoy the warmer weather without worrying about hidden issues. Whether you handle these tasks yourself or hire professionals like Downspout Services for exterior cleaning, taking care of these areas now protects your property and creates a welcoming outdoor space for the months ahead.
Conclusion
Following this checklist not only enhances your home's curb appeal but also helps safeguard your health, saves money, and protects your property's long-term value. Deep cleaning clears out dust, pollen, and mold - especially important as allergy season kicks into gear - while routine maintenance helps catch small problems before they turn into expensive repairs.
As Allen Rathey, Director of the Indoor Health Council, puts it:
"A regularly cleaned home is healthier, looks (and) smells better, and lasts longer."
A clean and organized home doesn't just improve physical conditions - it can also provide a mental boost. Plus, tasks like testing smoke detectors or clearing gutters go a long way in improving safety. These benefits make it the perfect time to get started.
If you're pressed for time or hesitant about tackling tasks like climbing ladders, professional help can make all the difference. Downspout offers a range of exterior cleaning services, including gutter cleaning, pressure washing, roof inspections, and window washing, serving Rhode Island and parts of Connecticut. Their fully insured team takes care of the hard-to-reach and time-consuming jobs, ensuring your home’s exterior stays in great shape.
Feeling overwhelmed? Start small - focus on one room or an outdoor area to build momentum. Spring weather provides the ideal conditions to tackle these tasks, whether you handle them yourself or bring in professionals for the more demanding work. Taking action now not only prevents potential problems down the road but also gets your home ready for the season ahead.
FAQs
What spring cleaning tasks should I do first?
Begin your spring cleaning by focusing on the exterior of your home. Take a close look at your windows, gutters, siding, and roof to spot any damage from winter or areas that may need repairs. Pay special attention to cleaning out gutters and downspouts, as this ensures proper drainage and helps prevent water damage. Getting these tasks out of the way early allows you to address any problems right away and creates a strong starting point for the rest of your spring cleaning efforts.
How do I know when to replace my HVAC air filter?
If you start noticing more dust around your vents, weak airflow, rising energy bills, odd smells, or inconsistent temperatures between rooms, it’s probably time to replace your HVAC air filter. To keep your air quality high and your system running efficiently, check the filter regularly and swap it out every 1 to 3 months - or sooner if these problems show up.
When should I hire a pro for gutters or roof checks?
Spring is the perfect time to schedule a professional inspection for your gutters and roof. If you’ve noticed signs of damage or simply want a detailed review, bringing in the experts is a smart move. They’ll look for problems like damaged shingles, leaks, or clogged gutters that disrupt water flow - issues that can lead to bigger headaches if left unchecked.
Winter weather can be tough on your roof and gutters, and an inspection helps catch problems early, saving you from expensive repairs down the line. Plus, tackling hard-to-reach spots on your own can be risky. A professional not only ensures a thorough job but also prioritizes your safety.